-
Shop
- Advanced Technologies
- AI Skills
- AI Skills Mastery 2026 Collection
- Bathroom
- Beauty
- Best-Sellers
- Bluetooth Speakers
- Car Accessories
- Car Buying & Ownership
- Car Electronics
- Chargers
- Confidence
- Dating & Social Skills
- Education & Learning
- Family & Parenting
- Fashion
- Accessories
- Alexander McQueen
- Bags
- Bags & Wallets
- Balenciaga
- Belts
- Blazers
- Blouses & Shirts
- Bottega Veneta
- Bottoms
- Brunello Cucinelli
- Burberry
- Chanel
- Chloé
- Dior
- Dolce & Gabbana
- Dresses
- Etro
- Fendi
- Gucci
- Hats & Hair Accessories
- Hoodies & Sweatshirts
- Jacquemus
- Jewelry
- Jil Sander
- Keychains
- Kiton
- Luggage
- Luggage Bags
- Miu Miu
- Off-White
- Outerwear
- Prada
- Rick Owens
- Saint Laurent
- Socks & Tights
- Sweaters & Cardigans
- The Row
- Tom Ford
- Tops & Shirts
- Valentino
- Valentino Garavani
- Versace
- Vivienne Westwood
- Watches
- Furniture
- Gadgets
- Game Controllers
- Headphones & Earbuds
- Health & Beauty
- Health & Wellness
- Home & Garden
- Home Decor
- Home Electronics
- Home Styling & Organization
- Keyboards & Mice
- Kids & Babies
- Kitchen Best-Sellers
- Lighting
- Luxury Brands Collection
- Microphones & Accessories
- Parenting & Child Development
- Patio, Lawn & Garden
- Personal Growth
- Personal Style & Fashion
- Pet Care
- Pet Lifestyle & Wellness
- Pet Supplies
- Pets
- Phone & Tablet Accessories
- Shoes
- Smart Home
- Smart Life with AI
- Sport & Outdoors
- Travel
- Travel & Adventure
- Wealth
- Wellness
Ultra Soft Detailing Brush + Rack: Safe Car Cleaning
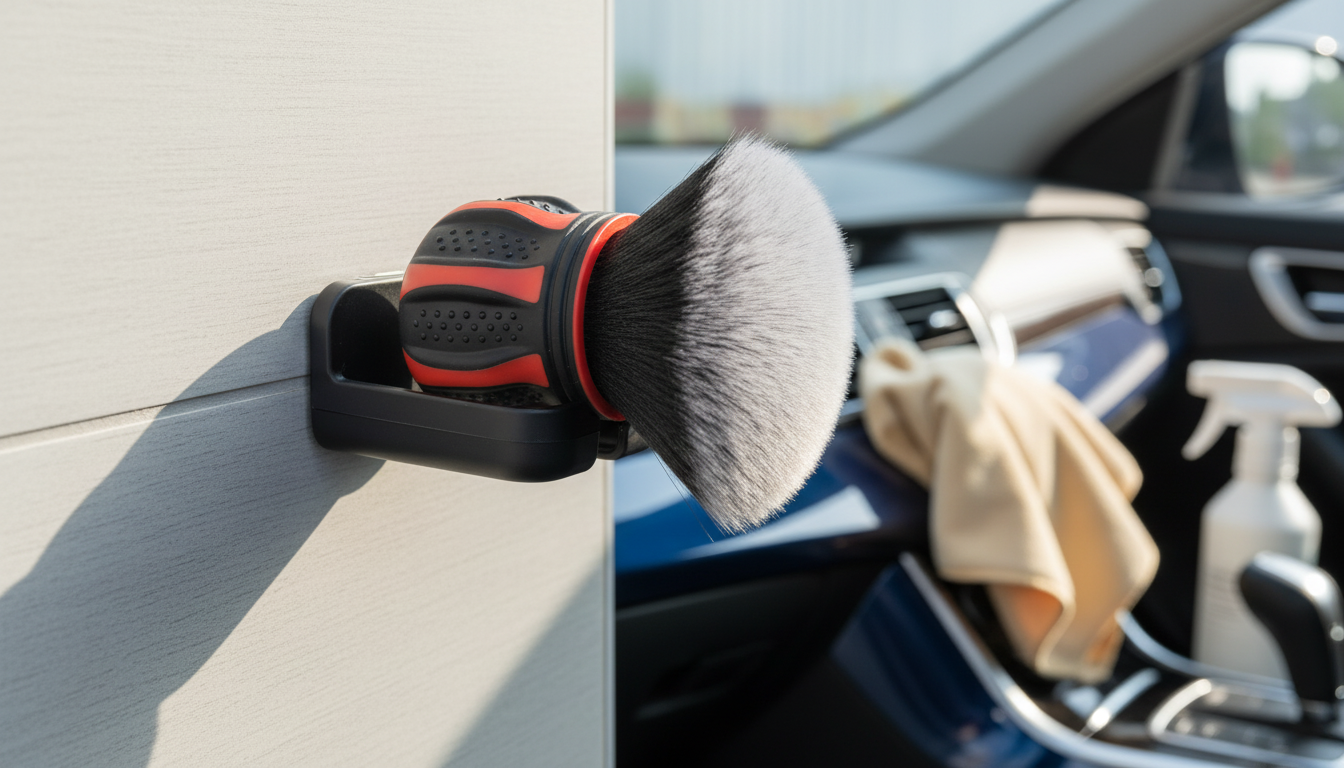
Ultra Soft Detailing Brush with Storage Rack – Gentle Precision for Interior and Exterior Cleaning
A quality detailing brush should lift dust and grime from tight seams without scratching sensitive surfaces. An ultra soft detailing brush set combines gentle bristles with a storage rack so tools stay clean, dry, and easy to grab—whether the job is interior vents and buttons or exterior badges and trim. For more guidance, see [PDF] City of Sumner Development Specifications and Standard Details.
What Makes an Ultra Soft Detailing Brush Different
- Designed for light-to-medium agitation where microfiber alone can’t reach: seams, crevices, and textured plastics.
- Ultra soft bristles help reduce the risk of marring on glossy trim, piano black, instrument clusters, and delicate exterior areas.
- Controlled brushing action helps loosen embedded dust so it can be vacuumed or wiped away instead of redistributed.
- A storage rack keeps brushes separated and organized to reduce cross-contamination between interior and exterior tasks.
Where to Use It Inside the Car
- Air vents: Brush with light pressure, then vacuum or wipe with a damp microfiber to capture loosened dust.
- Center console and shifter area: Work around buttons, seams, cupholders, and stitching lines where skin oils and debris accumulate.
- Door panels and window switches: Agitate along edges where grime builds up, then wipe clean for a crisp finish.
- Dash and instrument cluster surrounds: Use minimal pressure and follow with a clean microfiber to help prevent haze on clear plastics.
- Seat rails and tight tracks: Dry brush first, then spot clean if needed (avoid saturating mechanisms).
For interior work, the brush is at its best when paired with a vacuum nozzle held nearby. Brushing “floats” dust out of texture and seams; the vacuum catches it before it resettles. For further reading, see [PDF] city-of-eustis-engineering-design-standards-manual-2nd … – Eustis.org.
Where to Use It on the Exterior
- Badges and emblems: Loosen dirt around lettering and edges during a wash to prevent buildup in tight corners.
- Grilles and trim: Reach into narrow channels where wash mitts can’t fit.
- Fuel door area: Remove dust and residue along the hinge and inner lip.
- Wheels (light duty): Use only on cool surfaces and preferably dedicate separate brushes to avoid transferring brake dust.
- Around mirrors and panel gaps: Ideal for seams where road film collects.
On paint and exterior gloss surfaces, lubrication is the difference-maker. Brushing gritty contamination without soap or rinseless wash solution increases the chance of fine swirls—so treat the brush like a precision tool, not a scrub brush.
Quick Guide: Best Uses and Technique
- Use the lightest pressure that still moves debris—let the bristles do the work.
- Start dry for dust, then switch to slightly damp (or use a safe cleaner) for oily grime.
- Always follow brushing with a vacuum pass or microfiber wipe to remove loosened particles.
- Keep separate brushes for interior and exterior when possible to minimize scratching risk.
Use Area, Recommended Approach, and What to Avoid
| Area | Recommended approach | Avoid |
|---|---|---|
| Air vents | Light dry brushing + vacuum; finish with damp microfiber | Blasting debris deeper without vacuuming |
| Piano black trim | Very light strokes; wipe immediately with clean microfiber | Heavy pressure or dirty brush that can haze surfaces |
| Badges/emblems | Brush during wash with lubricating soap solution | Dry scrubbing gritty dirt on paint |
| Grilles | Gentle agitation with wash solution; rinse thoroughly | Letting soap dry in crevices |
| Wheel faces (light dust) | Dedicated exterior brush; rinse after each section | Using the same brush later on interior surfaces |
Why a Storage Rack Matters
- Organization: Keeps brushes visible and sorted, reducing the chance of grabbing the wrong brush for delicate areas.
- Hygiene and longevity: Promotes drying after rinsing so bristles stay cleaner and fresher.
- Less mess: Prevents brushes from rolling around in a trunk bin and picking up grit.
- Faster routine: A consistent home for tools makes maintenance cleanups easier to start and finish.
A rack also makes it simpler to create a “colorless system” even if the brushes look similar: keep the left side for interior-only, the right side for exterior-only, and never mix them.
Care Tips to Keep Bristles Soft and Safe
- Rinse after each use until water runs clear; shake out excess water before storing.
- Wash occasionally with mild soap; avoid harsh degreasers unless needed for exterior-only brushes.
- Air dry fully in the rack; avoid sealing damp brushes in containers where odors can develop.
- Inspect bristles for trapped grit; replace or reassign to dirtier tasks if bristles become contaminated.
- Keep a strict “interior-only” brush for the most delicate surfaces.
A Simple Cleaning Routine Using a Soft Detailing Brush
Product Options
- Ultra Soft Detailing Brush with Storage Rack – Car Interior & Exterior Cleaning — built for gentle, precise cleaning across interior and exterior areas while keeping tools organized between sessions.
- 60″x16″ LED Dimming Full Length Mirror — a bright, adjustable light source can make it easier to spot leftover dust on trim, smudges on glossy surfaces, and missed residue during garage detailing.
FAQ
Can an ultra soft detailing brush scratch paint or interior trim?
Soft bristles reduce the risk, but trapped grit is what typically causes scratching. Keep the brush clean, use light pressure, and add lubrication (wash soap/rinseless solution) on exterior paint; dedicating separate brushes for interior and exterior further lowers the risk.
Is it safe to use a detailing brush on air vents and around buttons?
Yes—gentle detailing brushes are commonly used for vents, switchgear, and tight seams. Start with dry brushing, avoid soaking electronics, and follow immediately with a vacuum pass or microfiber wipe to remove what you loosened.
How should detailing brushes be cleaned and stored after use?
Rinse thoroughly after each session, wash with mild soap when needed, and air-dry fully before putting them away. A ventilated rack helps them dry faster and stay cleaner, and it makes it easier to keep interior-only and exterior-only brushes separated.
Recommended for you


Was this article helpful?
Yes
No

Leave a comment